September 23, 2026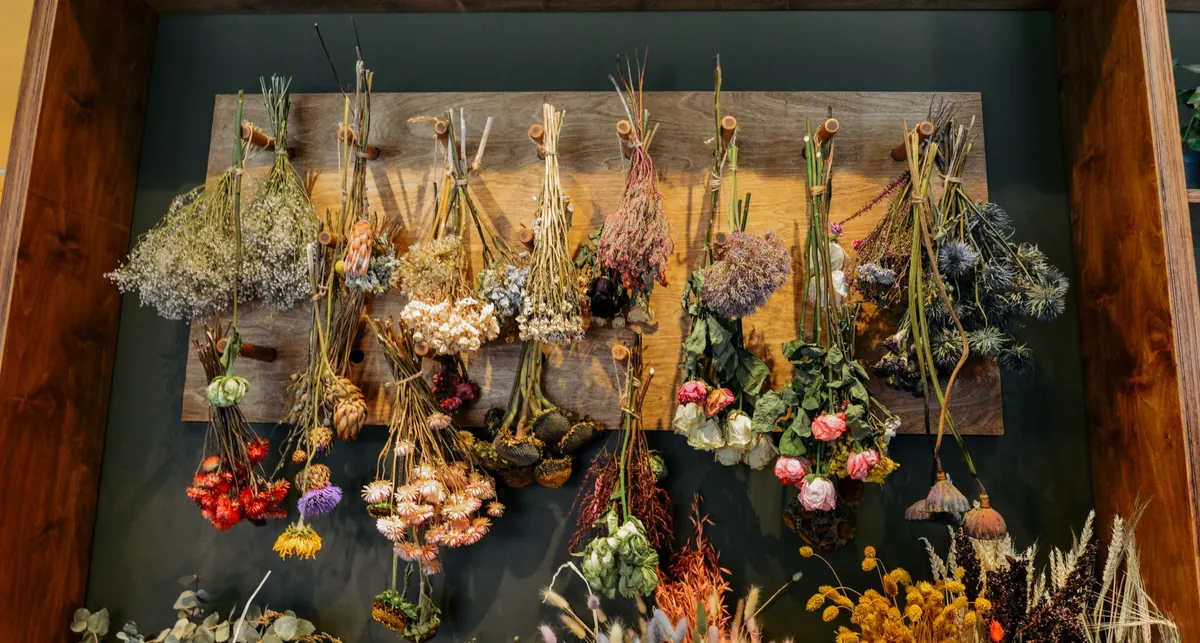
The best dried flower wall hangings rarely come from a shop. They come from a walk with secateurs in your pocket, a branch that was too good to leave behind, and a handful of stems you hung up to dry. The arranging takes an afternoon; the drying takes a couple of weeks. Here's how to gather, dry and build a piece that still looks good a year from now.
The good news is that this is one of the few craft projects where a beginner can match a florist, because the material does most of the work. Dried flowers are forgiving: they don't wilt while you dither, they don't need water, and if you change your mind you can pull a stem out and start again. The only genuinely irreversible step is drying, which is why it's worth getting the next two sections right.
Start With Flowers That Hold Their Shape
Not every flower dries well. Some turn brown and papery in a way that looks tired rather than vintage, and others drop their petals the moment you touch them. The reliable ones share a few traits: stiff stems, low moisture, and petals that already feel dry.
Good bets:
- Strawflower — the workhorse of dried work, holding colour for years.
- Statice — small papery clusters in blues, purples and yellows.
- Yarrow — flat heads that give an arrangement its structure.
- Hydrangea — generous heads; cut when the petals feel like paper, not when they're fresh.
- Lavender, celosia, nigella pods, honesty seed heads.
- Grasses and seed heads — bunny tails, wheat, oat, pampas, whatever is growing on the verge.
- Eucalyptus and rosemary for scent and silvery contrast.
Leave roses and dahlias for another method; hung upside down, they tend to dry muddy brown. Anything with a thick, fleshy stem, like a succulent, is best left in the garden.
If you're unsure about a plant, run a test: cut one stem, hang it somewhere dry for a week, and see what happens. A single sacrificed stem tells you more than any list. And don't overlook the unglamorous material — seed pods, twisted twigs, dried citrus slices and old man's beard all add the kind of texture that makes an arrangement look gathered rather than assembled.
Harvesting and Drying Without Losing Colour
Timing matters more than technique. Cut on a dry morning once the dew has lifted, and choose blooms that are just opening — fully open flowers lose petals as they shrink. Strip the lower leaves so the stems can breathe, then sort into bundles of six to eight stems, no thicker than your thumb.
Never cut after rain or first thing in the morning. Damp stems are the fastest route to mould, and a single mouldy bundle can spoil the ones hanging beside it. If you do end up with wet material, lay it flat on newspaper for a few hours before bundling.
Air drying
Tie each bundle with a rubber band, which tightens as the stems shrink, where string loosens. Hang it upside down somewhere dark, dry and airy: a closet, a shed, an unused doorway. Darkness is the step most people skip, and it is the main reason home-dried flowers fade.
Most stems are ready in two to three weeks. Lift a bundle and feel the thickest part of the stem — if it snaps cleanly instead of bending, it's done. If it bends, leave it another week. A kitchen is the worst place to dry anything: the steam from a kettle alone can undo a fortnight of patience.
If you're in a hurry
Silica gel or fine sand poured around a single flower in an airtight box sets its shape in a few days. It is fiddlier and the gel does not last forever, but for two or three focal blooms it is worth the trouble.
Dried flowers keep their best colour in the dark. If your finished piece hangs in direct sun, expect it to fade to soft parchment within a year — which can look lovely, but it won't be the piece you built.
Choosing and Prepping the Base
A hanging needs something to hang from. A foraged branch is the classic — birch, willow, grapevine, driftwood — but an embroidery hoop, a wooden dowel or a length of pipe wrapped in twine all work.
Aim for 30–60 cm of width. Narrower and there is no room for material; wider and it starts to look like a fence. Let a fresh-cut branch dry indoors for a week or two, and freeze anything foraged for 48 hours to deal with whatever is living inside it. A light sanding and a coat of oil or wax stops the bark flaking onto your wall.
Attach the hanging loop before you add a single flower. Tie twine to both ends, hang the bare branch on a nail, and slide the loop until the branch sits level. Mark it, knot it, and you will not be fighting a crooked branch later.
Arranging and Attaching the Flowers
Work flat on a table and do not attach anything until you are happy with the layout.
- Place the big pieces first. One or two large hydrangea heads or seed pods, set slightly off-centre, establish the scale of everything else.
- Build in odd numbers. Three statice stems clustered together read better than two spread apart.
- Add grasses and fine stems last. They should run past the ends of the branch and give the piece some movement.
- Step back and take a photo. A phone screen flattens the arrangement into the shape other people will see, and flaws jump out.
- Lay a little foliage behind everything. Sparse eucalyptus or rosemary tucked in first fills the gaps so light doesn't punch through the finished piece.
Three Ways to Attach Stems
Whatever you choose, work from the outside in and keep the back of the branch as tidy as the front — people see a wall hanging in profile more often than you'd think.
- Twine wrap. The most forgiving method. Lay the stem along the branch and wrap tightly three or four times, knotting behind. Best for grasses and soft stems.
- Florist wire. Bend a short length into a U, hook it over the stem and twist the ends behind the branch. Invisible and strong, ideal for heavier heads.
- A dab of hot glue. Fast, but brittle. Glue the stem to the branch rather than the flower head, and add a small wire twist as backup — glue alone will pop off in a warm room.
Making It Last a Year or More
Once it's up, dried work needs very little. A few habits will add months to it:
- Keep it out of direct sun and away from radiators, which dry stems further until they turn brittle.
- Dust gently with a hairdryer on cool, held at arm's length, or a soft paintbrush. Never wipe — dried petals crumble.
- Check the hanging loop and wire twists each season, particularly if the room gets humid.
- Treat a dropped stem as an opportunity. Dried arrangements look better slightly rearranged every few months than frozen in place forever.
That's the whole process: gather on a dry morning, dry it slowly in the dark, and take your time over the layout. Do those three things and you'll end up with something better than anything plastic-wrapped — and next summer you'll spot the next branch before you've even finished the first hanging.
Photo: Anna Lupa / Pexels